
GeoStudio is not just a simple analysis tool, but it’s a comprehensive geotechnical engineering software suite that is designed to tackle the complexities of real-world ground behaviour.
Geostudio is trusted by professionals, researchers, and students worldwide as it helps enable accurate modeling, advanced simulation, and reliable decision-making across a wide range of geotechnical challenges.
From slope stability and seepage analysis to stress, deformation, and environmental assessments, GeoStudio brings powerful tools together in one integrated platform.
GeoStudio software plays a critical role in tasks such as slope stability analysis, seepage modelling, and deformation studies, whether in GeoStudio 2D for quick cross-section checks or GeoStudio 3D for complex, real-world terrain.
In this blog, we’ll break down what GeoStudio is, explore its practical applications, and show why mastering GeoStudio geoslope tools is becoming essential for anyone serious about a career in geotechnical and civil engineering.
What Is GeoStudio?
GeoStudio is a comprehensive geotechnical engineering software designed and developed by Bentley. It is commonly and widely used by civil and geotechnical engineers to study and analyse soil, rock, and groundwater behaviour under real-world conditions. Plus GeoStudio has been designated to study and solve complex problems like slope stability, seepage, deforation and conduct dynamic analyses while using a single and integrated platform.
GeoStudio is known for its practical engineering focus, intuitive interface, and strong analytical software, which is incorporated to deliver a trusted choice for both academic learning and professional projects.
However, to master the learning for GeoStudio, one must gain practical knowledge along with theory. Several challenges can be witnessed while implementing civil and engineering projects, that is why engineers rely heavily on the GeoStudio manual and guided workflows.
Core Products in the GeoStudio Suite
GeoStudio 2D
The GeoStudio 2D is the most commonly used under the GeoStudio software suite. It is ideally used for analysing cross-sectional problems where conditions remain uniform along a length. Engineers frequently use GeoStudio 2D for: Slope stability analysis using GeoStudio (SLOPE/W)
Seepage and groundwater flow modelling, Stress–strain and deformation studies
GeoStudio 3D
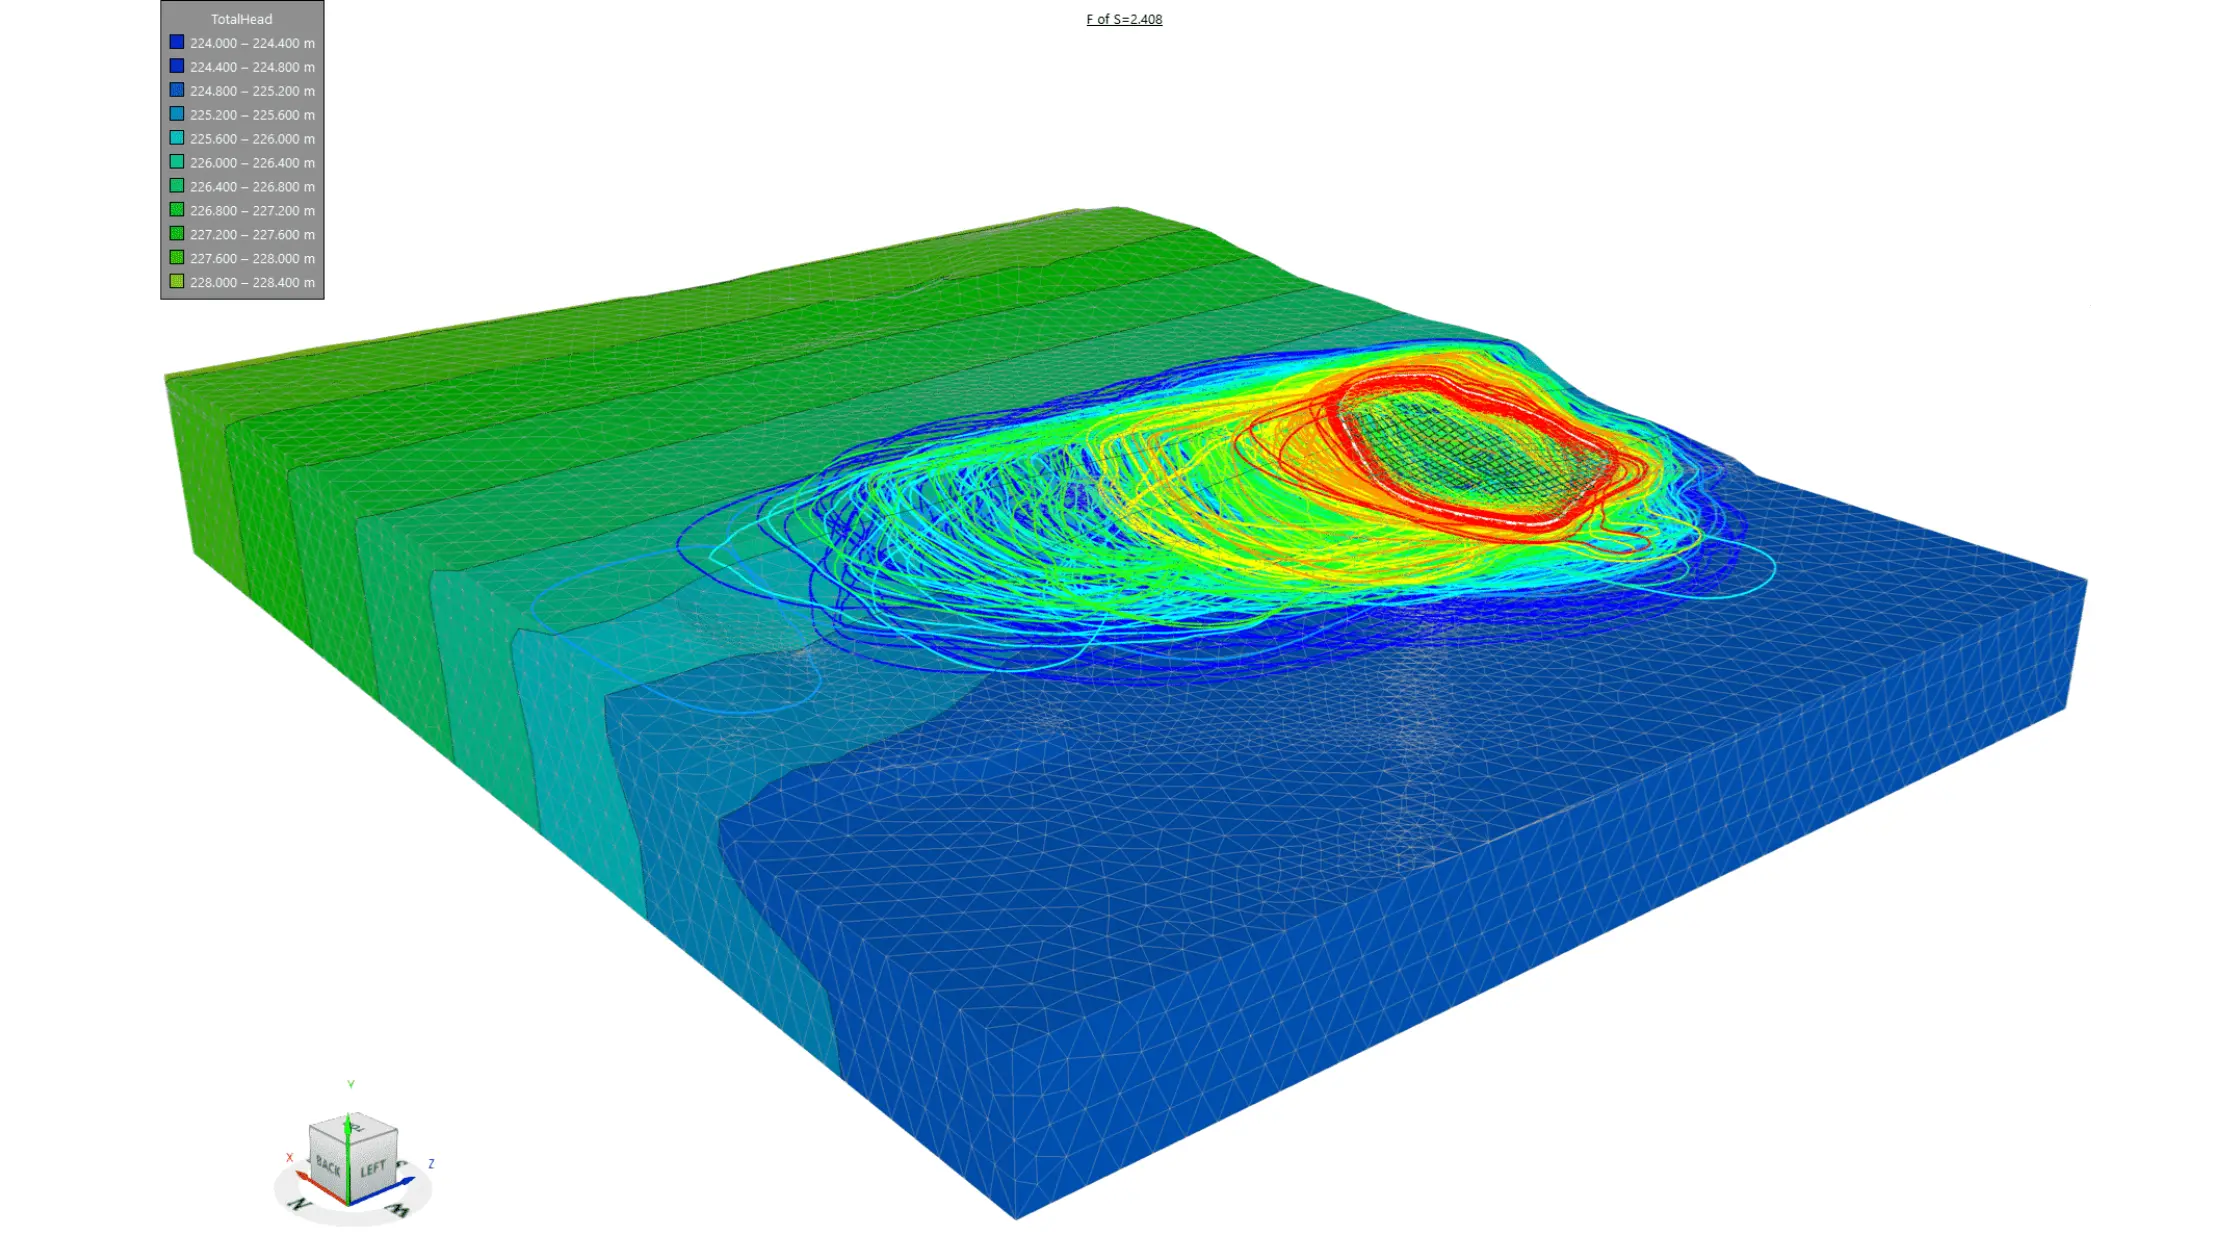
GeoStudio 3D is designed to extend GeoStudio’s capabilities into full three-dimensional modelling, allowing engineers to capture complex geometries and spatial variability that 2D models cannot represent. It is used when slope behaviour varies across the width or when the terrain is irregular.
GeoStudio 3D is particularly valuable for:
- Advanced slope stability analysis using GeoStudio in complex terrain
- Identifying realistic 3D failure surfaces
- Reducing uncertainty in high-risk geotechnical designs
What Is GeoStudio Used For?
Slope Stability Analysis
GeoStudio software is used to analyse slope stability, allowing engineers to evaluate the safety of embankments, cut slopes, dams, and retaining structures.
Groundwater Flow and Seepage Modelling
With the help of SEEP/W from GeoStudio Bentley (GeoSlope), engineers can now also analyse groundwater movement, pore water pressure, and seepage paths through soil and rock. This usage has become an important concern for dam safety, laying the foundation design, and flood-control structures, and is clearly detailed in the GeoStudio manual.
Stress, Deformation, and Settlement Analysis
GeoStudio software is also used to study how soil and rock respond to loads, excavations, and construction stages. There are a few modules, like SIGMA/W, which can help predict deformation and settlement, supporting safer designs and addressing common GeoStudio challenges.
Thermal and Heat Transfer Studies
GeoStudio is also applied to study the condition of heat transfer problems using TEMP/W, such as frozen ground analysis and temperature-dependent soil behaviour, expanding what GeoStudio is used for beyond traditional stability problems.
Integrated Multi-Physics Analysis
One of the best advantages of GeoStudio is its involvement of geoslope tools. With this, now engineers can link seepage, stress, and stability analyses within one project, making it easier to understand complex soil water structure interactions.
Geostudio is used in universities and industry areas across to offer different types of training programs designed for students on how they can use GeoStudio and learn about GeoStudio.
For beginners who wish to learn about GeoStudio, they too can learn about the course, software, and program easily. All they require is to follow s structures workflow with a detailed
The GeoStudio manual is designed to help beginners overcome the learning curve while gaining theoretical as well as practical engineering skills.
In summary, GeoStudio is a well-designed, well-equipped software with GeoStudio 2D and GeoStudio 3D, which is used to analyse, design, and validate existing and new geotechnical systems, making it one of the most valuable and essential tools for carrying out modern civil and geotechnical engineering activities.
Read More: PLAXIS Software in Geotechnical Engineering: A Complete Guide
Step by Step – How to use GeoStudio for beginner-friendly
Step 1 – Design to create a new project.
Now, under step 1, you can start opening the GeoStudio software and start creating new project files. Now, here you can choose the type of analysis you wish to make with SLOPE/W for slope stability while defining the working units.
Step 2: Describe and talk in detail about the material properties
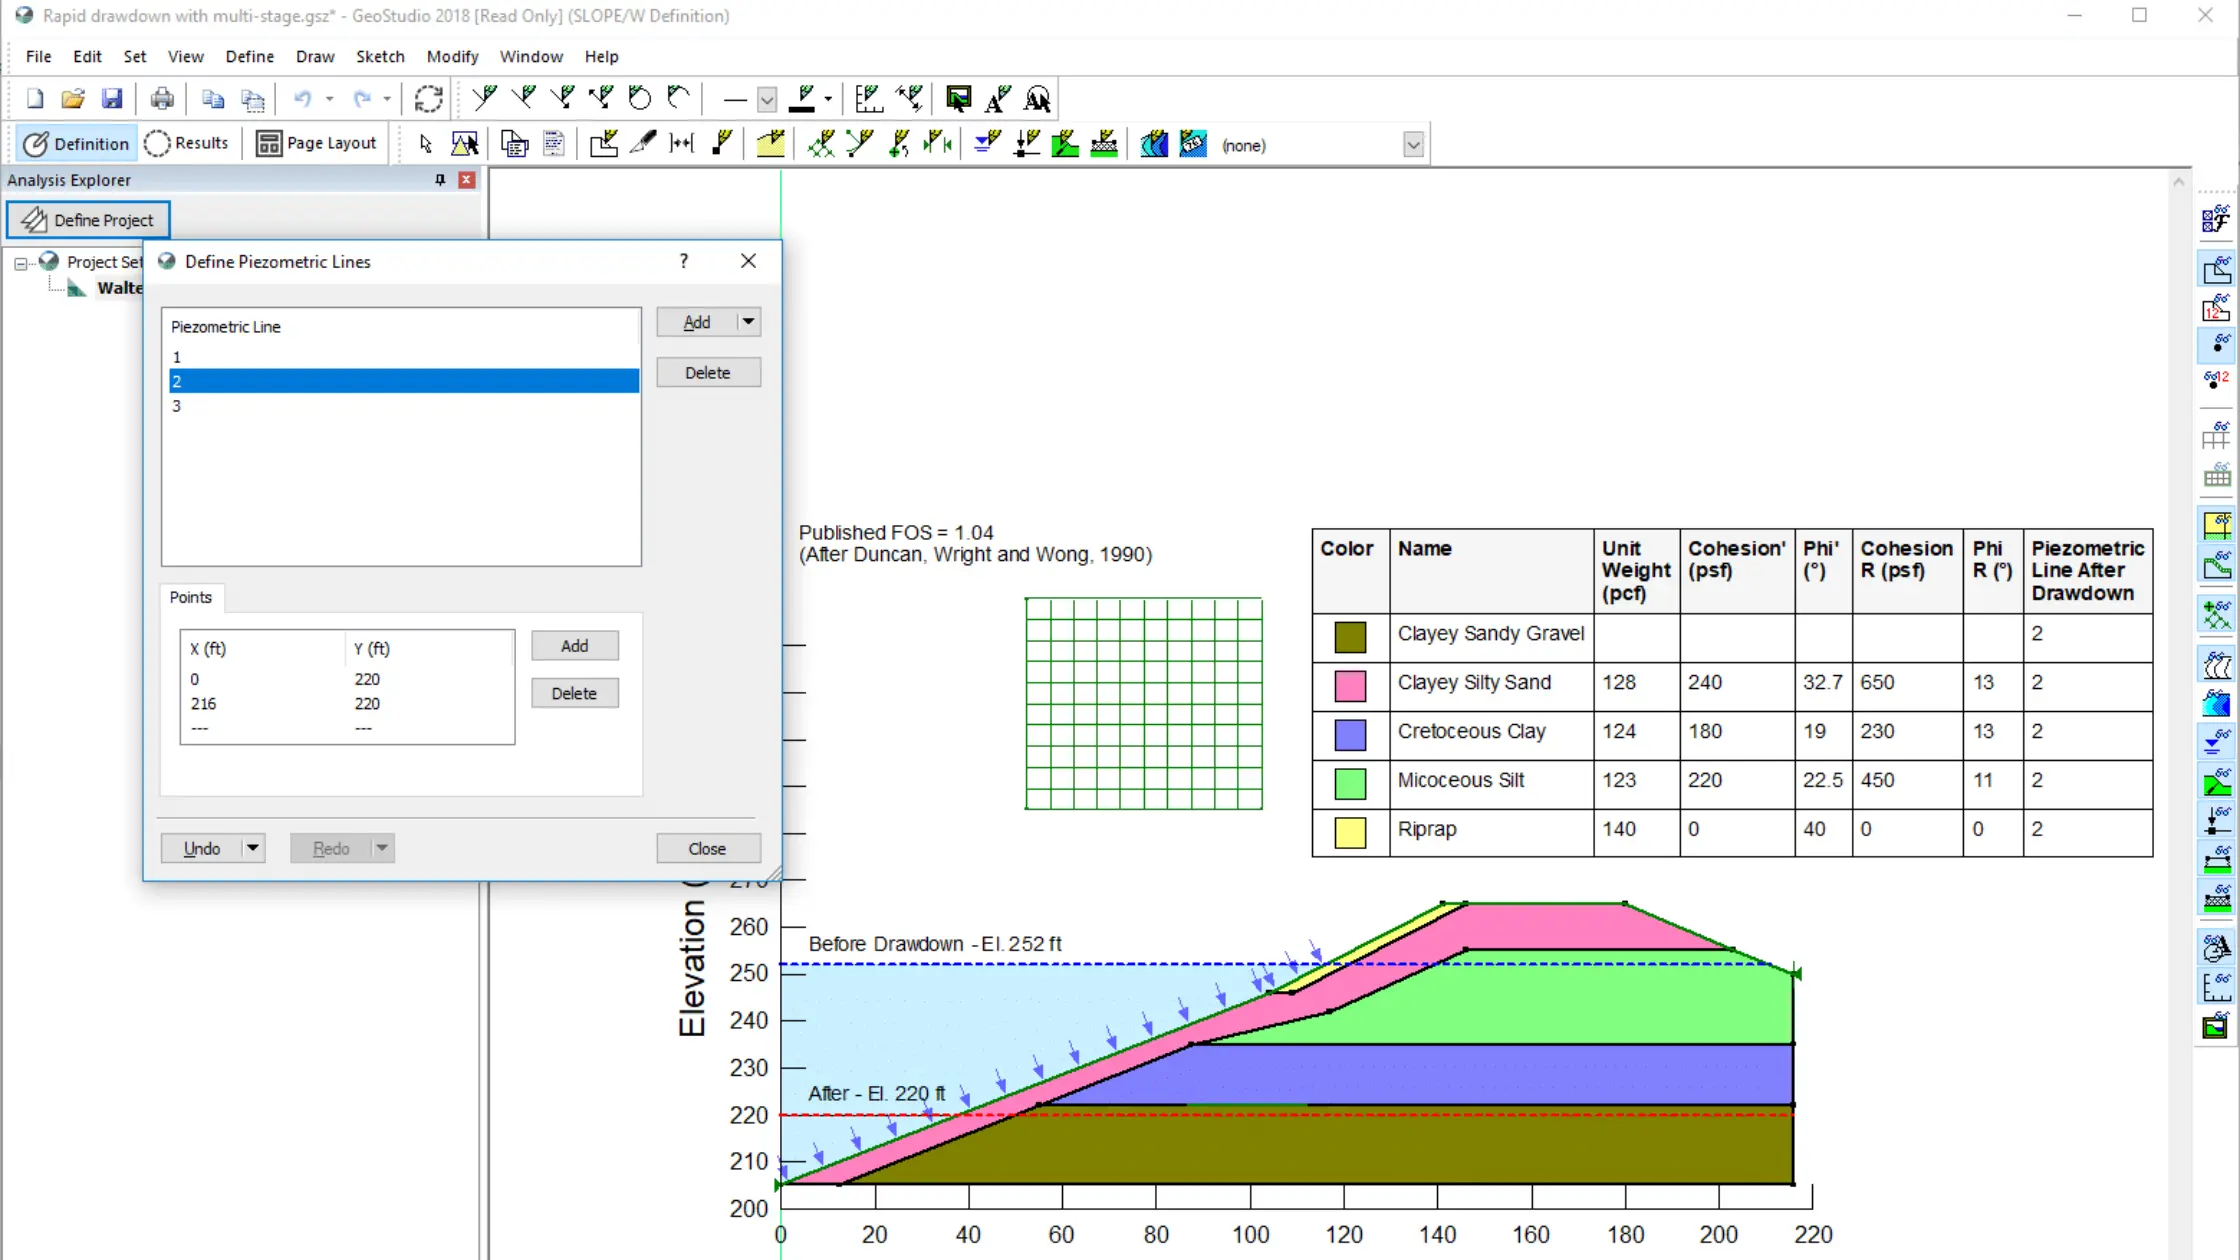
In this step, you need to work to describe the kind of material used. Here, you need to understand the need to assign soil and rock properties to each region of the model. You can even consider input parameters like the unit weight, cohesion, friction angle, and permeability.
Step 3: Set Boundary Conditions
In this step, your aim is apply boundary conditions such as water table location, pore water pressure, loads, and constraints. This step simulates real field conditions and is critical for realistic GeoStudio slope stability analysis and seepage studies.
Step 4: Solve / Run the Analysis
Once geometry, materials, and boundary conditions are defined, you can run the analysis. GeoStudio software can help calculate the factors of safety, stress distribution, and groundwater behaviour based on the selected analysis type.
Step 5: Interpret Results
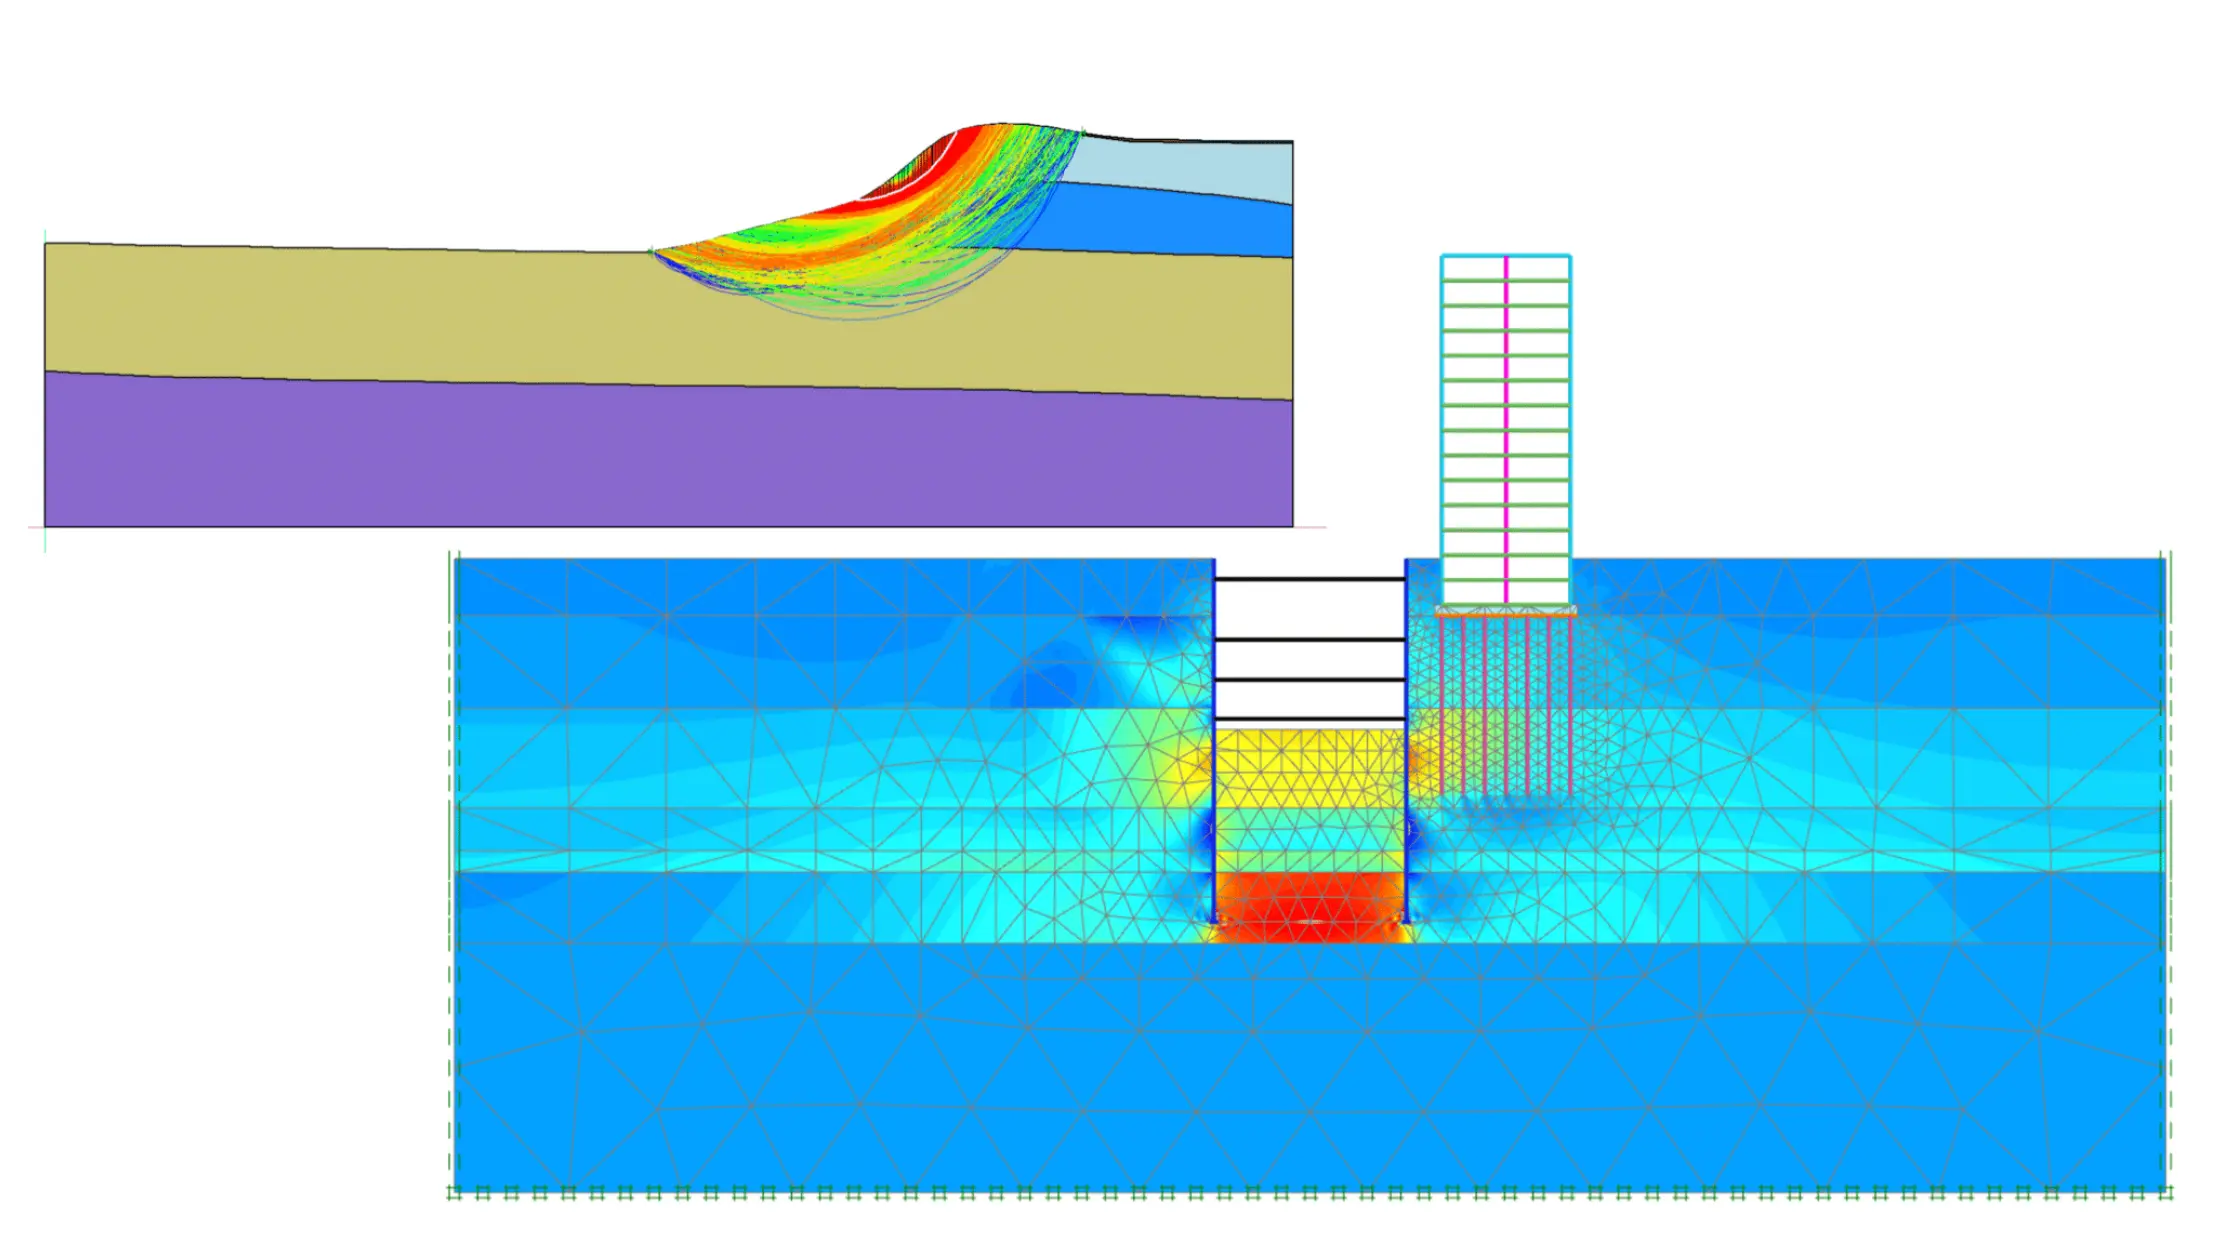
Under the last step, you need to review the outputs such as factor of safety values, critical slip surfaces, pore pressure contours, and deformation plots. With this understanding, the results that you have gathered help engineers evaluate design safety and demonstrate what GeoStudio is used for in professional geotechnical practice.
This structured workflow makes using GeoStudio easy for beginners while covering core applications like slope stability analysis using GeoStudio in both GeoStudio 2D and GeoStudio 3D environments.
GeoStudio for Slope Stability: Best Practices
Understand the Tool Before You Dive In
To dive into understanding the GeoStudio software, first, you must know how to conduct powerful geotechnical analysis that is used to solve real-world earth and rock stability problems.
So if you are conducting slope stability analysis using GeoStudio in exploring advanced 3D models with GeoStudio 3D, then start with the basics in the GeoStudio manual to avoid early pitfalls and confusion.
Choose the Right Dimension for Your Project
This is one of the most important steps, as 2D models with SLOPE/W are ideal for long embankments or cross-section checks, while 3D models capture complex terrain and failure surfaces more accurately. Understanding how to use GeoStudio to select the appropriate analysis saves time and leads to better designs.
Use Integrated Groundwater with Stability Models
Don’t try to treat the slope geometry in isolation; understand the groundwater conditions. You can try involving pore pressure and seepage layers directly within your GeoStudio workflow to reflect reality and improve confidence in your results.
Simplify First, Add Complexity Later
When starting with a GeoStudio slope stability analysis, you can simply begin with a simple model to verify basic results before adding complexity like anisotropy, staged construction effects, or reinforcement. This approach can help with troubleshooting and avoiding common GeoStudio challenges.
Use Visualisation to Validate Your Assumptions
If you want to know how your model behaves or work you can get GeoStudio’s graphics, contour plots, and result visualisations to know how your model behaves. Interpreting results visually not only highlights potential design flaws but also supports clearer reporting.
Explore Multiple Failure Mechanisms
Don’t rely on a single slip surface result. Yes, try alternative search strategies and shape optimisation (especially in 3D) to help ensure your design isn’t missing a more critical failure mode, which is a central part of slope stability best practice.
Learn from the Manual and Community Resources
The official GeoStudio manual and online resources are invaluable for understanding modules and nuances. If you hit a GeoStudio challenge, documentation plus community examples, especially those shared in the GeoStudio Community, can often save hours of trial and error.
Stay Updated with Latest Versions & Features
New releases, like enhancements in slip surface optimisation for 3D or better mesh handling, help you push beyond manual techniques toward faster, more reliable stability models. Keeping current ensures you aren’t missing out on key performance gains.
These are some of the best practices that can help make your slope stability analysis easy with GeoStudio plus accurate, efficient, and engineering-ready. So if you are using Studio 2D, learning what GeoStudio is used for, or stepping into GeoStudio 3D modelling for advanced geotechnical design, these are some of the best practises you must keep in mind.
Conclusion
GeoStudio has established to become a cornerstone of modern geotechnical engineering because it turns complex ground behaviour into clear, actionable engineering insights. You can gain expertise and practical world knowledge by learning from PIGSO Learning. Enrol in our Geostudio Online Training Course program to get the knack of the software and ace your learning.

Simran Shekhawat is an experienced SEO content writer with three years of hands-on experience in crafting high-impact digital content. With a strong command of search engine optimisation practices, she specialises in creating content that not only reads well but also ranks effectively. Her expertise encompasses keyword research, topic clustering, on-page SEO, content strategy, and crafting copy that aligns with both user intent and brand objectives.